|
|
||
|---|---|---|
| .. | ||
| Img_0.png | ||
| Img_1.png | ||
| Img_2.png | ||
| Img_3.png | ||
| Img_4.png | ||
| Img_5.png | ||
| Img_6.png | ||
| Img_7.gif | ||
| Img_8.png | ||
| Img_9.png | ||
| Img_10.png | ||
| Img_11.png | ||
| Img_12.gif | ||
| Img_13.png | ||
| Img_14.png | ||
| Img_15.png | ||
| Img_16.png | ||
| Img_17.png | ||
| Img_18.png | ||
| Img_19.png | ||
| Img_20.png | ||
| Img_21.png | ||
| Img_22.png | ||
| README.md | ||
README.md
需要的环境
1.安装unity3d 4.x版本,推荐4.7.1,暂时不兼容5.x版本。
2.运行环境配置:将Setting目录内DLL解压缩,将包中Dll文件置于C:\Windows\System32目录下。
3.对应Egret3D引擎代码为3.2.0,如果低于此功能会有部分功能无法使用或者出现bug。
unity示例场景
1.打开插件内容Egret3D/Example内示例场景Example。
Mesh导出
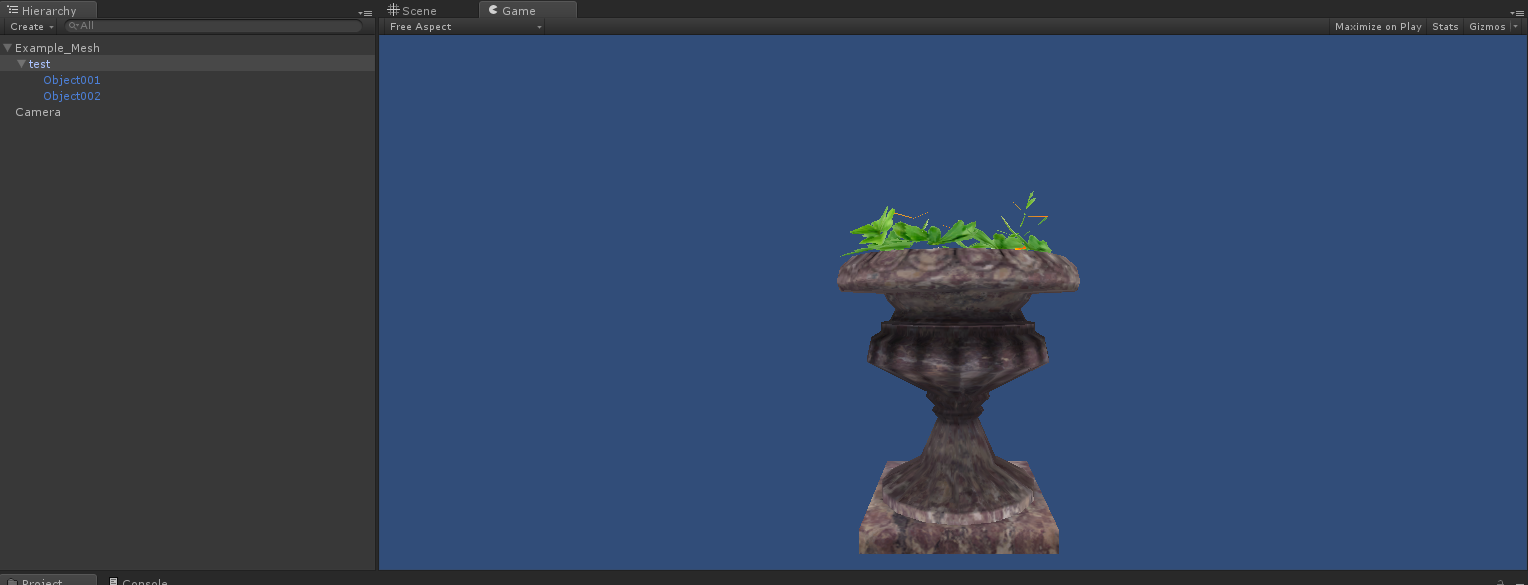
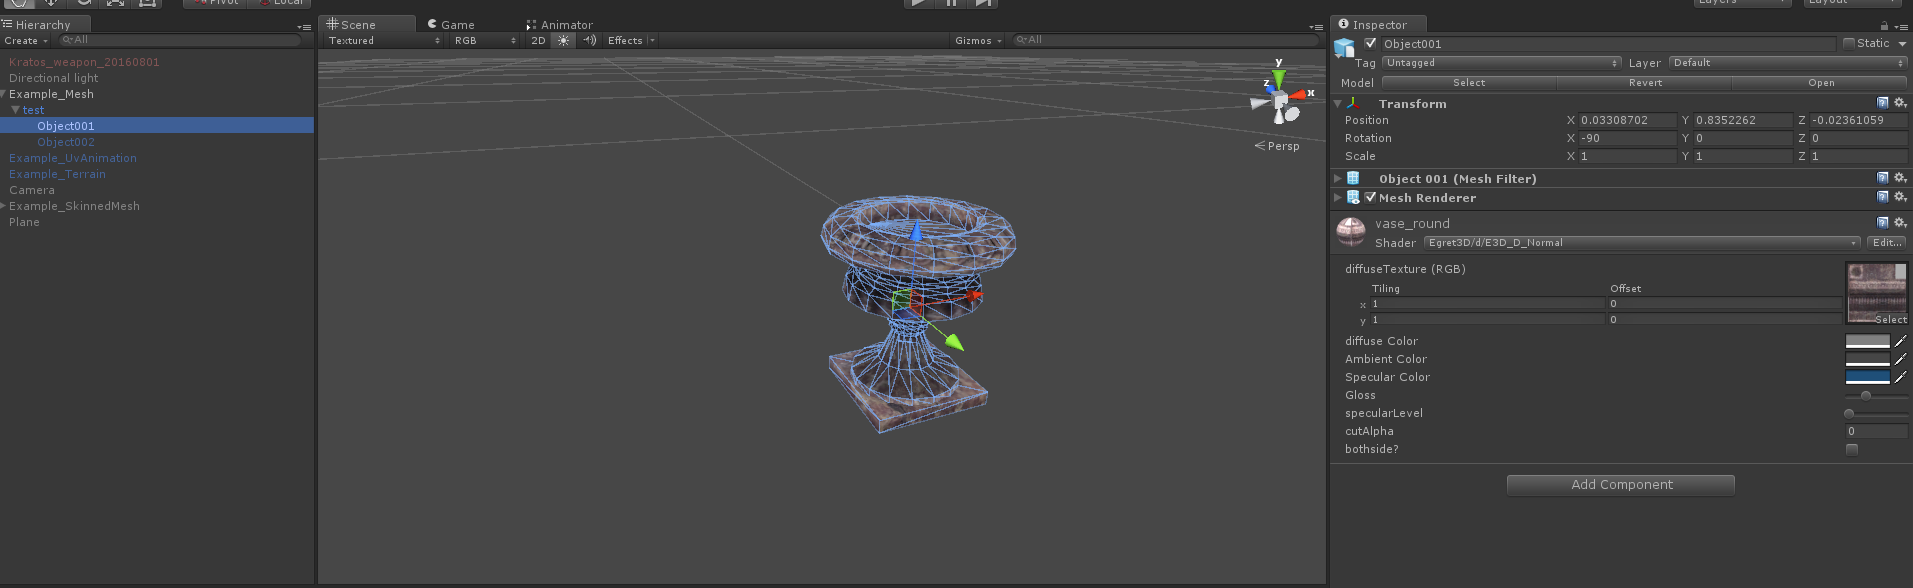
1.将场景中Example_Mesh的active勾选为为可见,如下图所示:
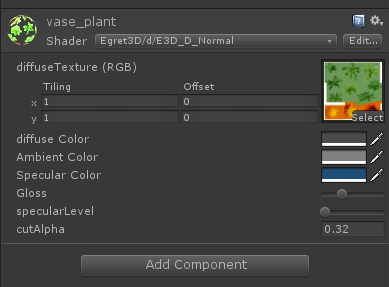
2.进行导出前需要注意的是,由于unity shader的多样性,很难完全适配,所以推荐使用Egret3D下的shader对相应导出场景进行替换,也在MaterialShader中添加自己
所需要对应的类型,diffuseTexture支持Tiling和Offset功能(仅支持单张贴图)。
3.点击工具栏,选取场景导出按钮,即可导出。

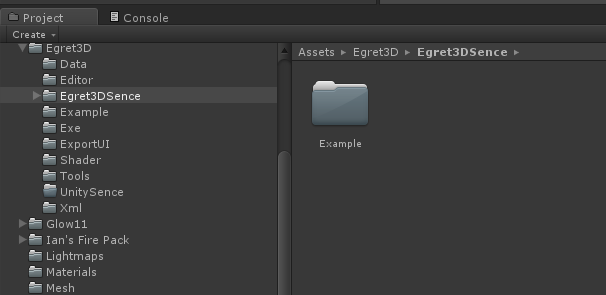
4.导出内容将自动保存在Egret3D/Egret3DSence目录下,可以点击查看导出内容。
5.Egret3D引擎使用示例资源展示。
6.注意事项:
	a.由于引擎的不同,导出mesh对象的scale缩放值不能小于0。
	b.关于尺寸大小的调节,如果为fbx文件导入unity,推荐使用Import Setting中scale factor的大小进行缩放,
	c.由于unity中坐标单位是米,故导入Egret3D相关参数已经已经进行了缩放处理。
	d.支持多Material导出
SkinnedMesh导出##
1.将场景中Example_SkinnedMesh勾选为为可见,如下图所示:
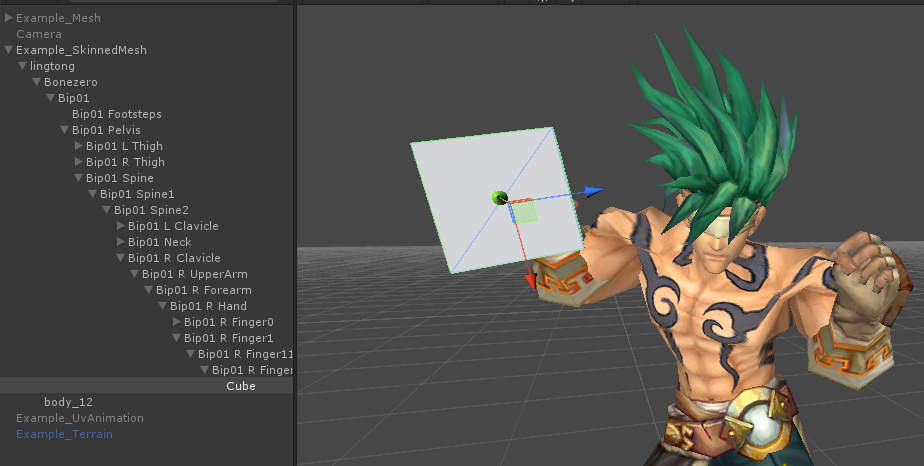
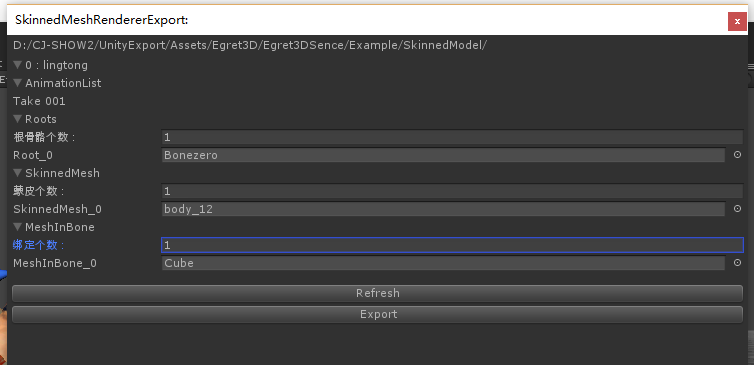
2.调整模型shader,可以参考mesh的调整方案。调整完毕后,点击SkinnedMeshRendererExport按钮,每个导出的shinnedmesh都包含动画列表,skinned列表,
根骨骼列表和骨骼binding列表。其中根骨骼必须拖选,少选或者不选会造成错误。骨骼binding是可选,根据需求进行绑定。这里我们演示手指绑定一个cube。
3.确认无误后导出,运行至Egret3D引擎,如下所示

4.注意事项:
	a.现阶段骨骼动画支持animator组件,暂不支持animation组件,请确认后导出。
	b.可以指定多个根节点。
	c.骨骼的scale缩放暂时还不支持,需要置一后才能导出。
	d.现阶段骨骼binding仅支持绑定mesh资源,其他内容需要拓展。
	e.支持资源换装处理。
	f.导出资源将自动重置坐标至(0,0,0)坐标点。


5.代码示例 Class_SkeletonAnimationEx:
module egret3d {

    export class Class_SkeletonAnimationEx extends Class_View3D {

        protected role: Role;
        protected view1: View3D;
        protected cameraCtl: LookAtController;

        public constructor() {
            super();

            this.view1 = new View3D(0, 0, window.innerWidth, window.innerHeight);
            this.view1.camera3D.lookAt(new Vector3D(0, 100, -100), new Vector3D(0, 0, 0));
            this.view1.backColor = 0xff888888;
            this._egret3DCanvas.addView3D(this.view1);

            this.cameraCtl = new LookAtController(this.view1.camera3D, new Object3D());
            this.cameraCtl.distance = 150;
            this.cameraCtl.rotationX = 60;

            this._egret3DCanvas.start();
            this._egret3DCanvas.addEventListener(Event3D.ENTER_FRAME, this.update, this);

            var roleLoader: RoleLoader = new RoleLoader();
            roleLoader.addEventListener(LoaderEvent3D.LOADER_COMPLETE, this.onLoadComplete, this);
            roleLoader.load("resource/0_0122_huanghunshibing/RoleConfig.json");
        }

        protected onLoadComplete(e: LoaderEvent3D): void {

            this.role = e.data.role;

            this.view1.addChild3D(this.role);

            this.role.skeletonAnimation.play();
        }

        public update(e: Event3D) {
            this.cameraCtl.update();
        }
    }
}
地形和光照导出
1.将场景中Example_Terrain勾选为为可见,如下图所示:
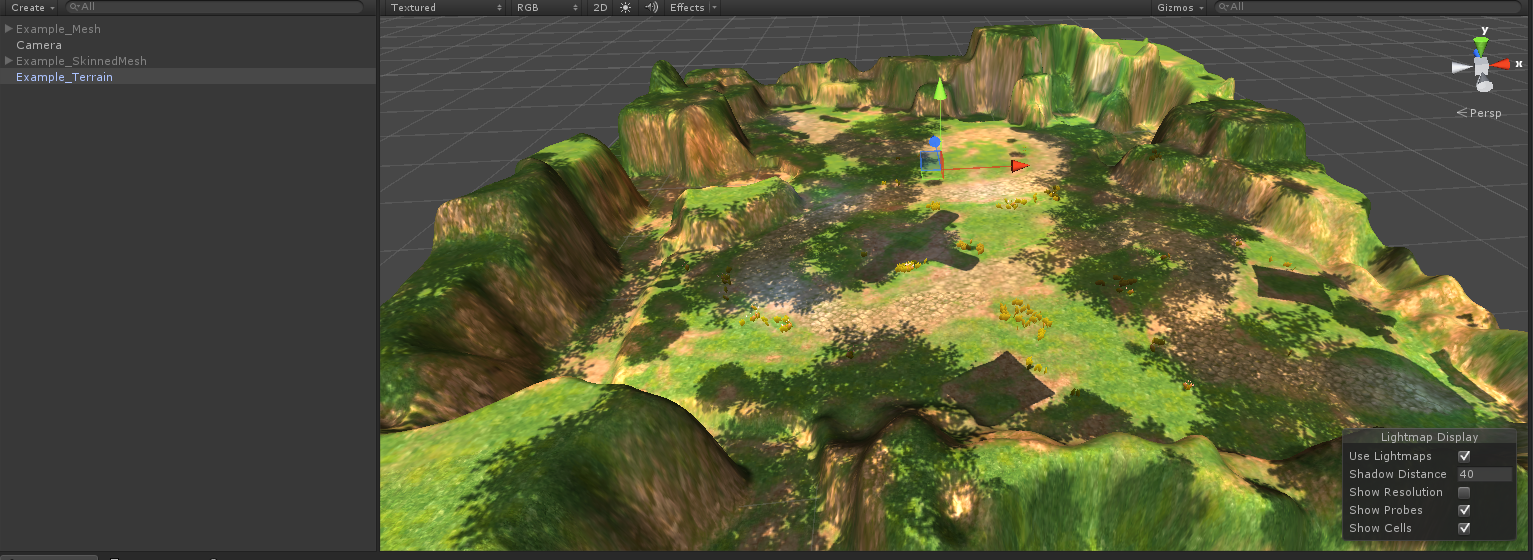
2.确认无误后导出,运行至Egret3D引擎,如下所示
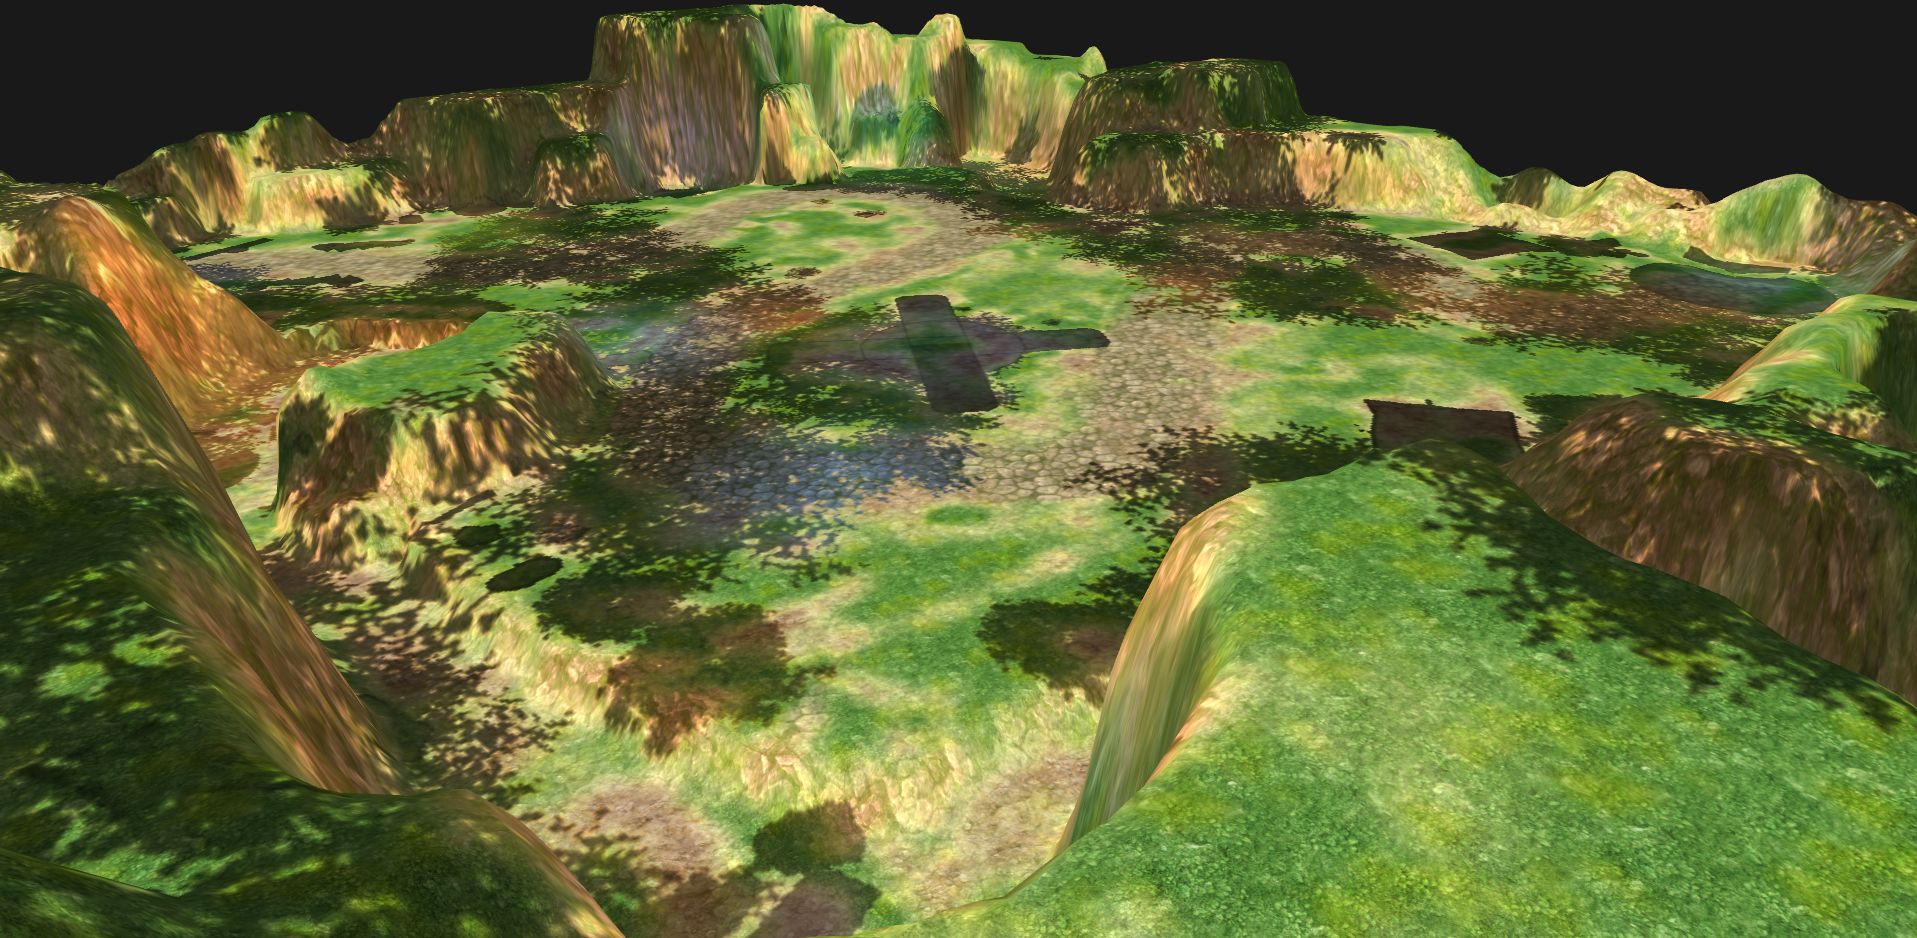
3.注意事项:
	a.unity地形中绘制的花草是无法被导出的。
uv动画
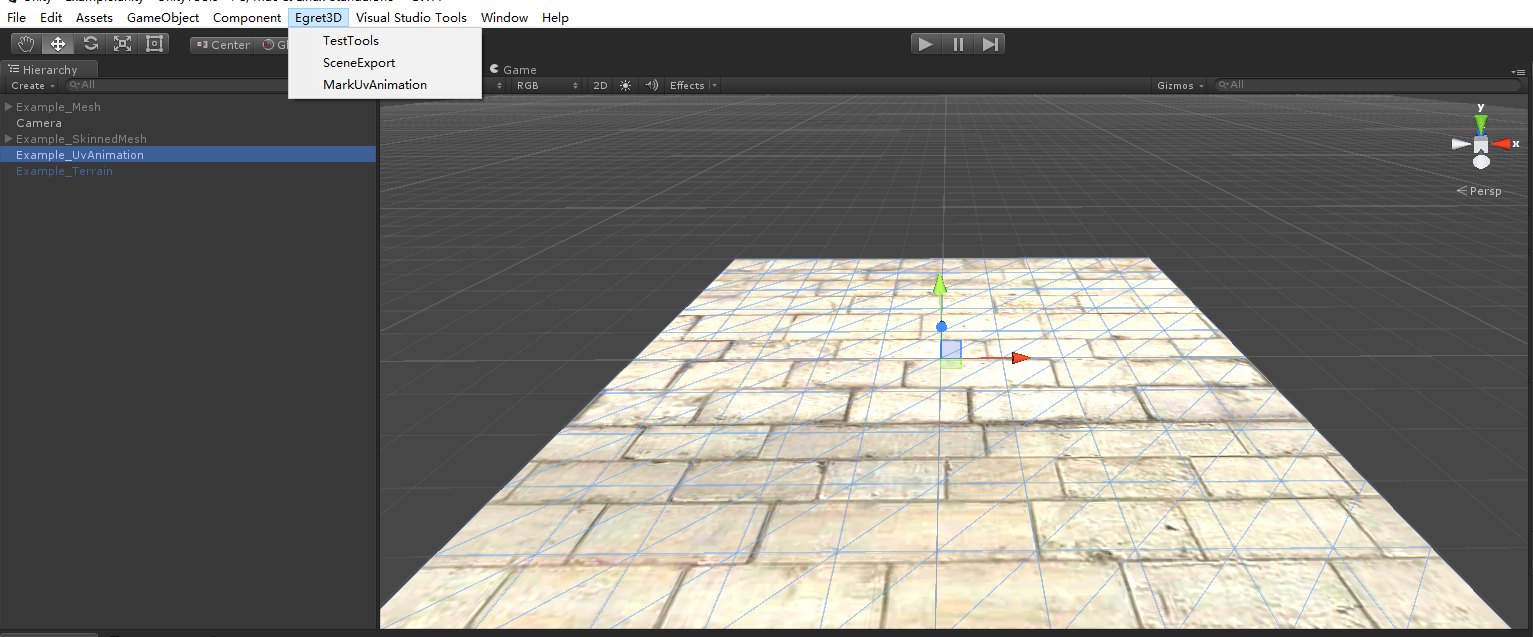
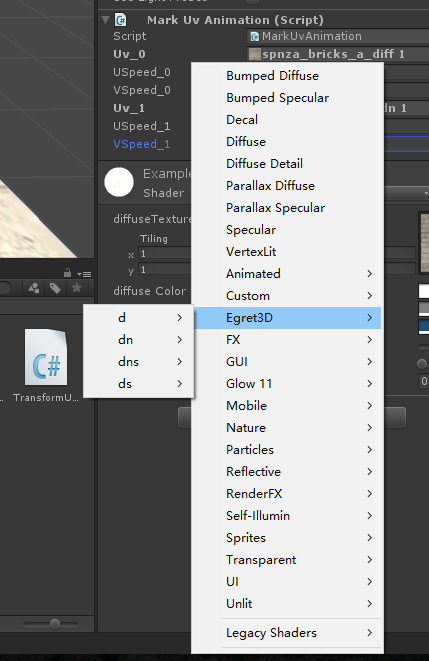
1.选中UV动画对象(可以多选),点击工具栏,选取MarkUvAnimation按钮,如图所示。
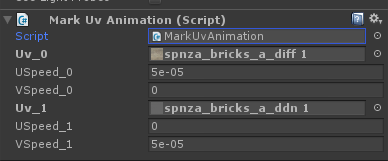
2.查看修改对应参数:
	a. uv_0,不可为空,单张UV。
	b. uv_1,暂时不可用。
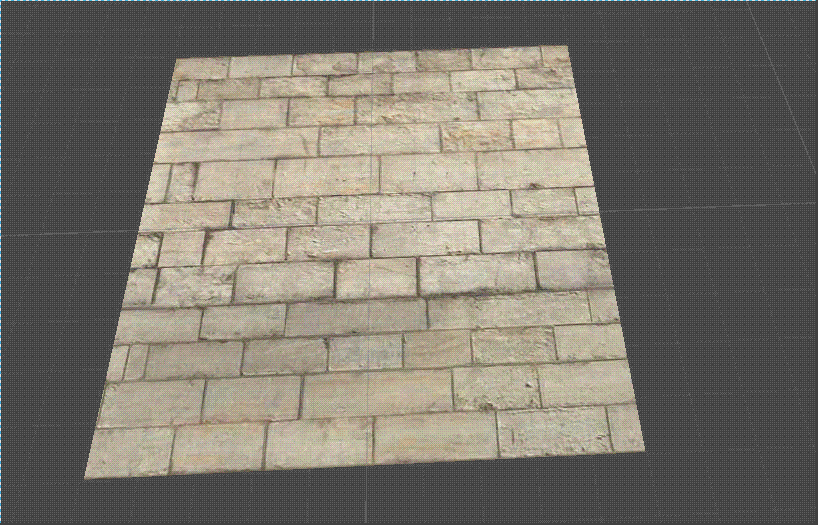
3.运行效果,可以在场景内运行unity查看效果:
4.注意事项:
	a.支持unity中预览滚动效果,以实际在Egret3D效果为准。
shader说明
1."Egret3D/dns" 其中dns分别指的是
	a. d=>diffuseTexture
	b. n=>normalTexture
	c. s=>specularTexture
2. 如果需要使用transparent的透明效果,可以调节Egret3D目录下shader的cutAlpha值进行实现。
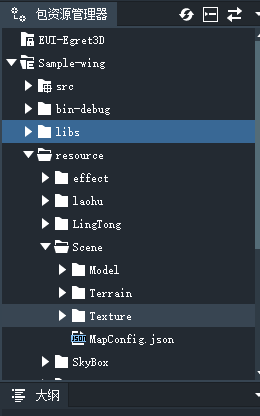
资源导入
1.将导出资源文件夹放入如图所示位置:
2.使用maploader进行读取使用:

Alpha错乱问题
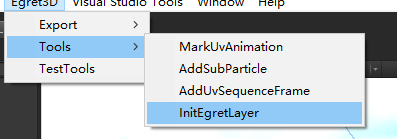
1.点击工具栏,选取InitEgretLayer按钮,如图所示。
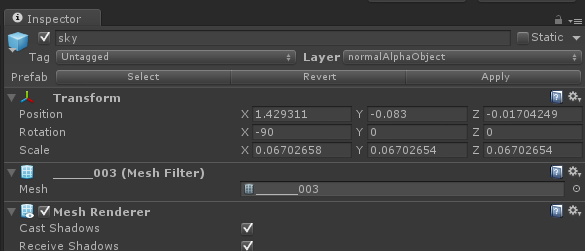
2.设置存在问题对象的layer层次,如图所示,完毕后导出即可。
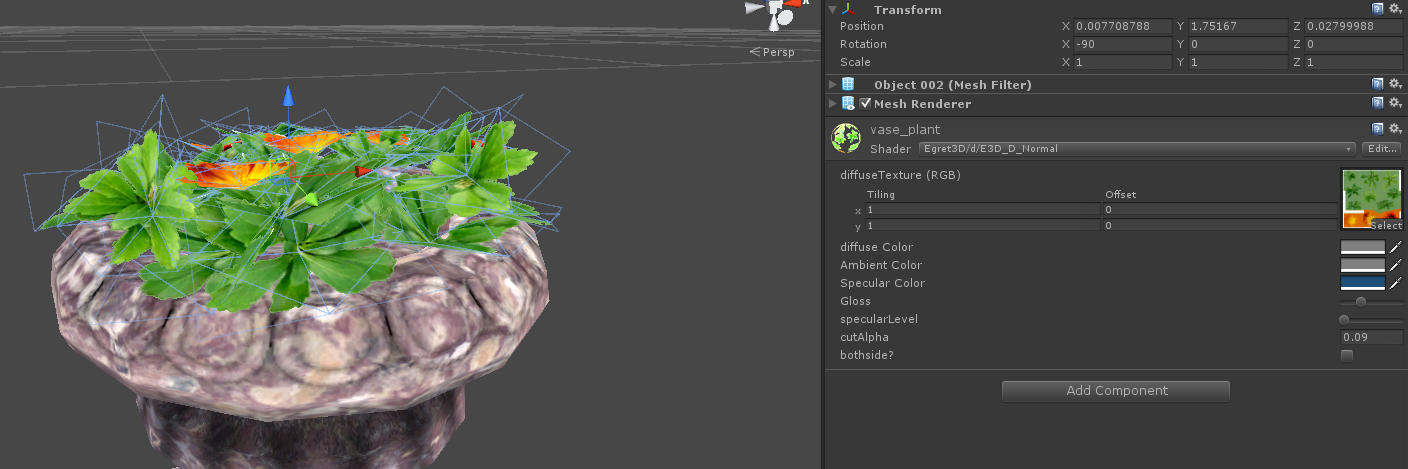
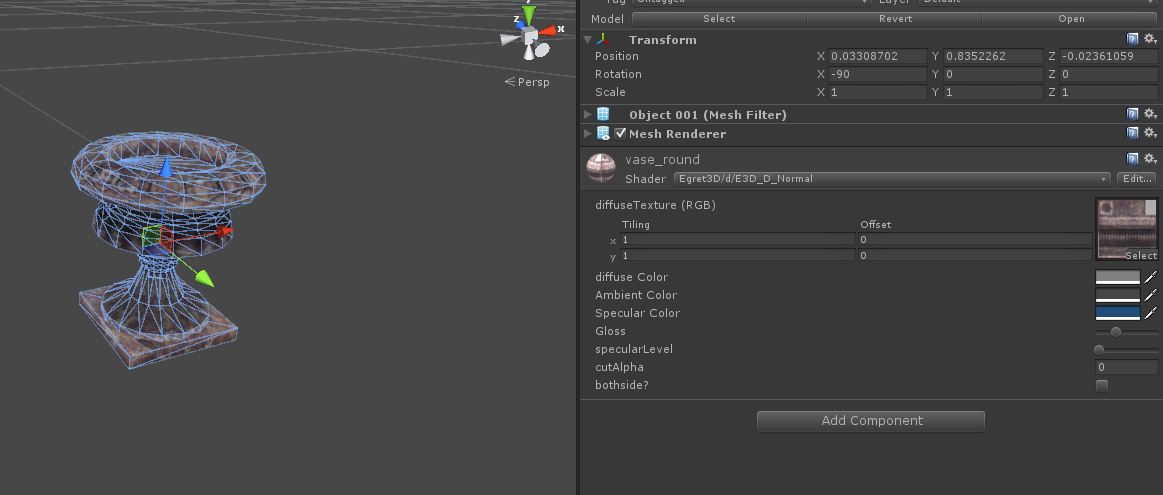
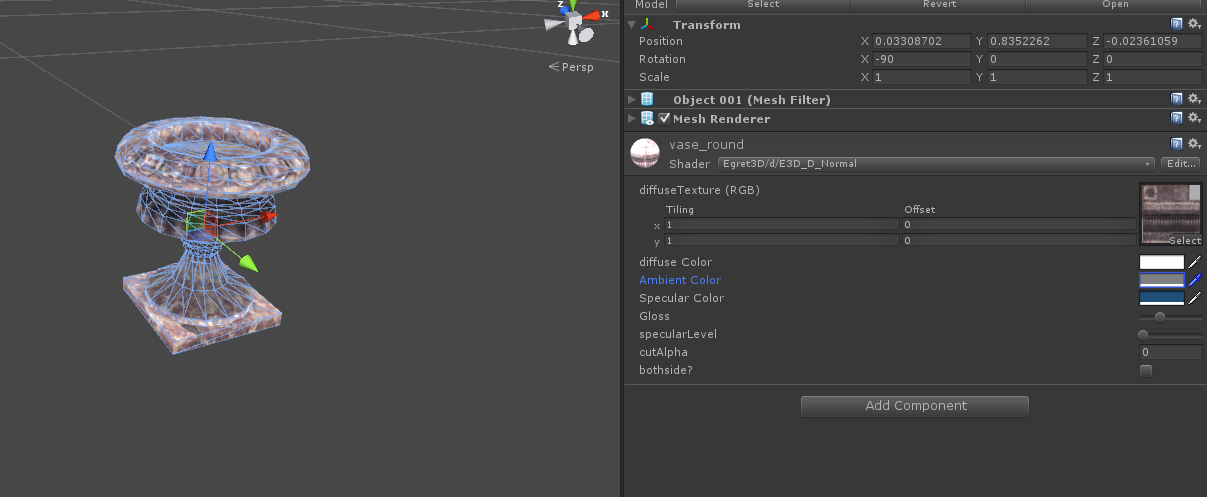
Shader调节示例
1.选中如图所示mesh。
2.调节颜色值,可以看到显著变化。(当前版本unity显示与Egret3D引擎内,会存在色差问题,建议以Egret3D为准对颜色进行调整)
3.对于如何扣除图片的透明像素的处理方法,我们可以使用cutalpha功能进行实现。